Introduction To Elementor 500 Internal Server Error
The Elementor 500 internal server error is a frequently encountered issue in WordPress caused by several underlying factors.
In this article, we will take a systematic approach to work through each possible cause of this error and provide you with actionable steps to troubleshoot and resolve them.
Table of Contents
Elementor 500 Internal Server Error Explained
The Elementor Server Error (also referred to as Elementor 500 Internal Server Error) is an error message that indicates something has gone wrong on the web hosting server.
This 500 Internal Server Error is one of five classes of HTTP response status codes a web hosting server encounters, that prevents a website from fulfilling a command or request.

Given our current situation, this 500 Internal Server Error prevents the request to “UPDATE” an edited webpage using Elementor. So how do we go about fixing this issue?
Fixing Elementor's 500 Server Error: My First Recommended Action Plan
Before we proceed to outline the common causes of the Elementor 500 internal server errors and recommend ways to troubleshoot and fix them.
How about I walk you through my recommended 3-step action plan to resolve this issue? The troubleshooting process, which we will be discussing next, should be used as a fallback plan if the steps I am about to show you do not immediately resolve the issue.

The first step we need to take is to clean up our website's database, and while it may not directly address the Elementor 500 Internal Server Error, it can potentially help to address underlying issues that could be contributing to the error.
Generally speaking, as we use and customize our WordPress site, its database accumulates redundant data from various sources, such as page and post revisions, spam comments, and residual files from outdated plugins and themes.
So, it's important to periodically get rid of these redundant files to ensure optimal site performance.
Clean Website's Database & Increase Memory Limits
For your convenience, I made a video that addresses the steps we are about to take, so if you'd rather prefer to watch the video, just click the play button below to get started.
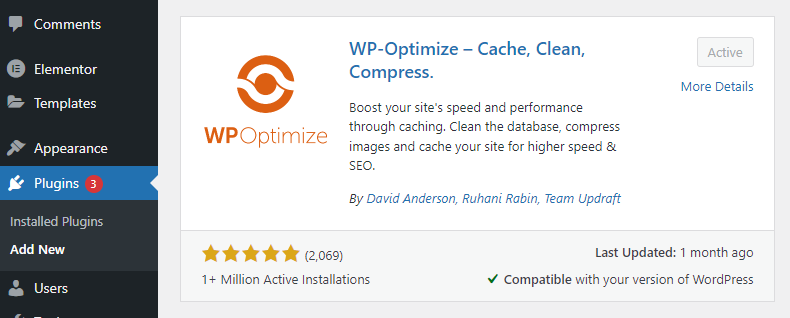
Step 1. Install and activate WP-Optimize Plugin
Let's start by logging into our WordPress dashboard.
- Navigate to “Plugins” on the left-hand menu → To select “Add New”
- Search for the plugin “WP-Optimize”, and then → Click on the “Install Now” and “Activate” buttons.
Step 2. Clean or Optimize Website's Database
Before we go ahead with this, I'd recommend that you take a backup of your website since the optimizations we're about to make are irreversible.
Picking up from where stopped in step one, when the Plugin is active;
- Let's highlight the WP-Optimize Plugin → To select “Database”.

Upon selecting the database, you should find some default optimizations selected.
I recommend running each optimization separately and fall-back to confirm if the page you wish to make the update goes through. If the page does not update, move on to the next optimization and repeat until the update goes through.
Note: Whether the steps outlined above worked for you or not, I would recommend proceeding to the third step nonetheless.
In addition, it's best to run a quick check of your website to ensure that everything is still intact and functional after the optimization we just performed.
Step 3. Increase PHP Memory Limit Allocated To Your Website
The PHP memory limit refers to the maximum amount of memory that is allocated for executing scripts on a WordPress website. This limit is usually set to ensure that the site doesn’t exceed the server’s RAM capacity allocated by the hosting provider.
Generally, Elementor requires a minimum of 128MB of memory to function optimally, and when a website includes other plugins, Elementor recommends using a minimum of 512MB. Supposing the PHP memory limit is not set high enough to meet this requirement, it can result in errors or malfunctions, including the 500 internal server error.

To ensure that your website's memory limits meet Elementor requirements, let's take a look at the current PHP memory limit set for our WordPress site.
Now, while there are a few ways to check the memory limit in WordPress, luckily, Elementor provides us with a tool that gives us an overview of our site's configuration settings.

To access this tool from your WordPress Dashboard
- Highlight “Elementor” on your admin panel → To Select “System Info”.
The System Info page should display a summary of your site's server and WordPress configurations, with mine currently set to 40MB.
This page should also come in handy in helping us troubleshoot the other cause of this 500 internal server error, as it provides us with the current configurations on our website and how we can use this information to meet Elementor's minimum requirements.
How To Increase PHP Memory Limits
For your convenience, here is a video that addresses the steps we are about to take, so if you'd rather prefer to watch the video, just click the play button below to get started.
To increase the PHP Memory Limits, you'd need to edit the “wp-config.php” file on your WordPress site. You can either use an FTP client or file manager in your web hosting Cpanel.
But I've got a better option we can use right within our WordPress dashboard, and that would require installing the plugin “File Manager“.

- After installing the “File Manager” plugin → I would need you to open it.
- For this demonstration, I changed the theme's style to grey.
- Once you’ve opened the File Manager Plugin → public_html, I would like you to locate the “wp-config.php” file by scrolling down the page that opens up when you click your website's name or public_html.
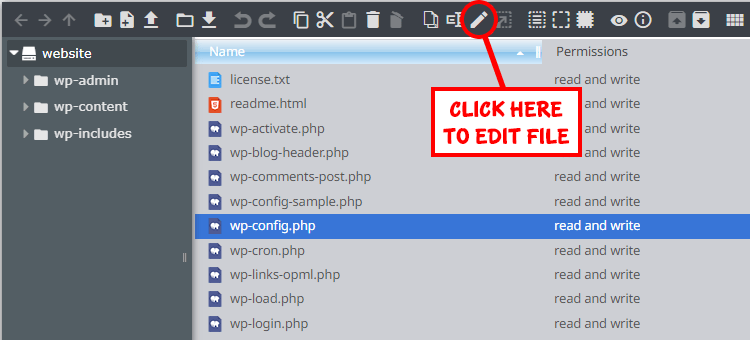
- After locating the “wp-config.php” File → Please click the pencil icon to edit it.
This should open a modal box similar to the image below.

Now, I'd need you to scroll down this modal box till you find the line that reads as follows:
/* Add any custom values between this line and the “stop editing” line. */
- Next, I'd need you to copy and paste the code provided below beneath this text, as shown in the image.
- Lastly, ensure that you save your changes → By clicking on the “Save & Close” button.
define( 'WP_MEMORY_LIMIT', '512M' );
Essentially this code tells WordPress to increase the PHP memory limit to 512MB.
Now, we can return to the Elementor's System Info page to verify that our changes have been applied successfully.
When the PHP memory limit is increased, we can head back to verify if the “internal server error” has been resolved.
Note: If this solution doesn't work, it is possible that your web hosting service provider does not allow its website owners to increase the PHP memory limit.
In that case, you should contact your web hosting provider to increase your WordPress PHP memory limit manually.
That concludes my recommended three-step action plan to fix this problem.
Now, let's discuss the other common causes of the Elementor 500 Internal Server Error and the efficient approaches for troubleshooting and resolving them.
Additional Factors that lead to Elementor 500 Internal Server Error
In addition to the previously addressed issues, I have outlined other possible factors that can cause the internal server error. While providing the best approach to troubleshooting and resolving possible conflicts.
1. Third-Party Plugin or Theme Conflicts
Sometimes, plugins and themes that are or suddenly become incompatible with Elementor can cause conflicts when both Elementor and the third-party plugin or theme attempt to modify the same function or code on a website, resulting in errors and conflicts.
Similarly, these errors and conflicts could occur when files related to third-party plugins or themes become corrupted or go missing.
To resolve the issue, you can try the following steps:
- Deactivate plugins and themes: Deactivate all plugins except for Elementor, and probably switch to a default WordPress theme such as Twenty Twenty-Three.
- After completing the initial step, verify if the page that displays the 500 server error updates successfully. If it does, that suggests a possible plugin or theme conflict.
- Now, proceed with activating each plugin individually, while heading back to confirm if the page displays the error again.
- Repeat this process until the error reappears to single out the plugin causing the issue.
- Now, deactivate this plugin and continue checking the remaining plugins one by one to ensure that the error isn't coming from more than one plugin.
Once you've identified the problematic plugin(s) or theme, it could be that the files associated with the third-party plugin have become damaged or corrupted. To rule out this possibility, you can update or reinstall the plugin or theme to see if it fixes the damaged or corrupt files. Otherwise, it may become necessary to remove the culprit altogether.
2. Elementor System Configuration
Like most tools and plugins, Elementor requires certain server configurations to function smoothly. When these configurations fall short of these requirements, they may become incompatible with Elementor, thereby causing a 500 internal server error.
To resolve the issue, you can try the following steps:
Here are the system requirements you need to meet to use Elementor without issues;
- WordPress 5.9 or Higher: Elementor works best with WordPress version 5.9 or greater.
Elementor warns against using older versions of WordPress, as they may expose your site to security vulnerabilities and bugs, given they've reached the end of their shelf life.

So, if your site's WordPress version is below 5.9, you can easily update it → By clicking the “Please update now” link or by navigating to your site's dashboard → To Select “Updates”.
Once you are on the “WordPress Updates” page, → Click the “Update to version __” button to start the process.
- PHP Version 7.4 or Higher: If the PHP version of your server is outdated (anything below 7.4) upon checking your system configurations, it's recommended that you contact your hosting provider and request an upgrade to the latest version.

- It is also recommended that you have an up-to-date MySQL version 5.6 or greater, or a MariaDB version 10.0 or greater.
Reviewing these system configuration settings can help you identify any requirements that do not meet Elementor's standards. Then reach out to your web hosting provider, where necessary to help make upgrades to their latest versions.
3. Check for corrupt .htaccess file
.htaccess file (called hypertext access) is a hidden configuration file used to control additional features for websites hosted on Apache Web Server.
The file allows us to perform functions such as rewriting URLs, setting passwords for directories, enabling hotlink protection, disallowing access to specific IP addresses, changing a website's time zone, and much more.
However, there are cases where this .htaccess file gets corrupted, which could invariably cause an Elementor 500 Internal Server Error.
Without getting technical, Here are ways to fix a corrupt .htaccess file:
- The easiest way to fix this is by navigating to the Settings page on your admin dashboard → To Select “Permalinks” → and then click on the “Save Changes” button.

After applying this change, WordPress will either update your site's existing .htaccess file or create a new one for it. You can verify whether one of these events occurred by checking the page that is being edited with Elementor to see if the server error has been resolved.
If this error persists, then You'd need to manually replace the .htaccess file.
How To Locate and Replace a .htaccess File?
For convenience, we would be using the “File Manager plugin” I mentioned here to achieve this rather than heading to the Cpanel's File Manager.
- Once you've opened the File Manager Plugin → public_html, you should find the .htaccess file below the “wp-includes” folder.

- Now, let's rename the main .htaccess file to something like .htaccess_old.
- To rename this file → Select the .htaccess file to highlight it → Then select the icon as displayed in the image above → To rename it to .htaccess_old.

- Next, we need to create a new .htaccess file → By clicking the → “New File” icon.
- Once selected, that should bring up three different file formats → Choose the “Plain Text” file format.
- You may find the new file titled “NewFile.txt” but you'd want to clear it all out and,
- Rename the new file as .htaccess → Then click “Enter” on your keyboard to save it.

- Now, let's highlight the newly created .htaccess file → Then click on the “Edit icon” to open up the file.
- This empty file should open in a plain text editor, where we need to copy and paste the code provided. Also, Don’t forget to save your changes.
					# BEGIN WordPress
<IfModule mod_rewrite.c>
RewriteEngine On
RewriteBase /
RewriteRule ^index.php$ - [L]
RewriteCond %{REQUEST_FILENAME} !-f
RewriteCond %{REQUEST_FILENAME} !-d
RewriteRule . /index.php [L]
</IfModule>
# END WordPress
Note: Lastly, remember to repeat the process of navigating to Settings → To Select the “Permalinks” page → and clicking on the “Save Changes” button.
This will regenerate the .htaccess file for your site with the proper rewrite rules to prevent 404 errors when accessing your website.
Final Thoughts
We've pretty much covered the most common causes of the Elementor 500 internal server errors and the recommended ways to troubleshoot and resolve them.
However, if the error persists, it might be necessary to seek additional assistance by reaching out to your web hosting support team. They can examine the server logs and determine the root cause of the problem.
We hope this article helped you fix the Elementor 500 internal server error, and speaking of errors you may want to know forehand before it happens to you – The best approach to resolving a stuck all-in-one WP Migration Import.